GOT THE KIT IN HAND? THIS IS THE STEP-BY-STEP GUIDE
WATCH THIS FIRST · TWO AND A HALF MINUTES
LET ME SHOW YOU
I filmed this myself, taking a real impression. In your kit the paste colours or the tray may look different from what you see here: the steps are exactly the same. Every step is written on screen, so it works with the sound off too. If something isn't clear, rewatch it before you open the silicone.
DIY IMPRESSION, STEP BY STEP
DENTAL IMPRESSION AT HOME the 2-step guide, 10–15 minutes per impression.
Updated 14 July 2026 · Grillz Marche workshop, Monte San Giusto (MC), Italy
Taking a dental impression at home is easier than it looks: I send you the kit (€25), you follow two steps and in 10–15 minutes you have the mould of your teeth. The material is enough for two complete attempts: if the first doesn't come out, the reserve is already in the box. First the thick putty that grabs the shape, then the light wash that captures the detail. You don't need a technician's hands: you just need to do things in the right order and send me a photo before you ship. I check it myself, and if something's off I tell you right away, so you waste neither time nor material.
01
Why the impression is everything
A grill is born from the mould of your teeth, not from a standard size. Everything that comes after (the 3D scan, the custom digital sculpting, the printing in dental alloy) starts from that piece of silicone you ship me. If the impression is sharp, the grill fits on the first try. If it's blurred or full of bubbles, that flaw follows it all the way to the end.
That's why I push so hard on this stage. Ten minutes done well at your place save me remakes and save you waiting. It isn't the glamorous part of the job, but it's the part that decides whether the piece will sit comfortably or wobble in your mouth.
02
What's inside the kit
When you open the box you find everything you need, nothing to buy elsewhere. Two pastes that activate when you mix them, and the trays where you take the impression:
- The thick putty
- Four pre-dosed jars, two orange and two white: one pair per attempt. You knead them together until the colour is even and they form the rigid shell that holds the shape of the arch.
- The precision wash
- Softer and more fluid: your kit has either two syringes (white and blue) or a single dual-chamber syringe — the sheet inside the box is what counts. It goes over the putty and captures the fine detail of the teeth, the edges and the small gaps the putty alone doesn't reach.
- Two trays, upper and lower
- Try the one for your arch empty first: if it doesn't cover all your teeth or presses on the gums, message me on WhatsApp BEFORE mixing and we'll sort it out.
- The instruction sheet
- With the doses, the times indicated and a photo of a good impression next to one to redo. Keep it in front of you while you work.
The material is enough for two complete attempts: the reserve jars and syringes are already in the box. If the first impression comes out sharp you're set, if something's off you have the second attempt ready.
03
The 3 rules before you start
Before you even open the pastes, three things that make the difference between a good impression and one for the bin. They sound obvious, but this is exactly where people slip up:
- Clean hands, never latex gloves
- Latex stops the silicone from setting: the paste stays sticky and won't harden properly. Wash your hands well and work bare-handed, or use nitrile gloves if you have them.
- Dry teeth
- Run a tissue over your teeth and wipe off the excess saliva before the tray goes in. On a wet surface the paste slides and the detail is lost. Dry mouth, crisp impression.
- Do a dry run and mark the centre
- Before mixing, try the empty tray in your mouth: watch how it goes in and memorise the centre point. Then, with paste in hand, you'll go straight to it without hesitating.
Do these three things and you've already cut out half the mistakes I see arrive. The rest is just following the two steps in order.
04
Step 1: the thick putty
The putty builds the shell. From the start of the mix you have a full 2 minutes to get it into your mouth: no need to rush, just don't pause.
- 01
Open one orange jar and one white one
The balls are already dosed, use them whole: nothing to measure. The other two jars are the reserve for the second attempt, don't touch them.
- 02
Knead for 30 seconds
Mix with your fingers until the colour is one single shade, no streaks, and don't go past 30 seconds. From the start of the mix you have 2 minutes to get it into your mouth: comfortable, no pauses.
- 03
Load the tray and centre it
Spread the paste evenly in the tray, then bring it into your mouth on the spot you marked earlier.
- 04
Push slow and hold the position
Push the tray slowly and straight towards the gum, never at an angle. Hold there for 3 and a half minutes, without talking and without moving your tongue, then remove the tray with both hands, very slowly: lift one edge just enough to let air in, then pull it STRAIGHT off your teeth, in one single movement.
You're left holding the rigid shell with a rough impression of the teeth. That's the base: now the detail goes on top.
05
Step 2: the precision wash
The wash adds the precision. It goes into the shell you've just made, so keep it ready and dry before you start.
- 01
Dry the saliva off the shell and teeth
Rinse the impression in cold water, dab the inside until it's no longer shiny and wipe your teeth again with the tissue. The wash only bonds well on dry surfaces.
- 02
Mix from the syringes and spread it in the shell
Kit with two syringes (white and blue)? Squeeze out half of each onto the mixing tray. Kit with ONE dual-chamber syringe and no mixing tip? Remove the cap, insert the plunger and squeeze out half the syringe onto a clean saucer: two side-by-side strips come out, that's normal. Either way: mix with the wooden stick for 30 seconds until the colour is uniform with no streaks, then spread a thin layer inside the putty impression: it should fill the detail, not overflow. The rest is the reserve for the second attempt.
- 03
Put it back in the exact same spot
This is the key step: reinsert the shell exactly where it sat before, with the same slow, straight push. If you shift it, the two layers don't match and the impression comes out doubled.
- 04
Hold still and remove
Stay still, without moving, for 3 and a half minutes. When it's ready, remove the tray with both hands just like before: air under one edge, then a straight pull in one go, and look at the result.
Now everything reads on the teeth: sharp edges, defined surfaces, no smooth empty patches. If it looks like that, you're set.
06
The photo before you ship
Don't ship blind. Before you close the box, take a sharp photo of the impression, in good light, and send it to me on WhatsApp. I want to see it before it leaves.
This is the photo gate, and it's what saves you from a wasted trip. If it's good I tell you to ship; if I spot a bubble or a missing edge I tell you right away and you redo just that one, with the material left in the kit.
You always wait for the OK: even if the impression looks sharp and complete to your eyes, don't ship it and don't book the pickup until I've answered. I'm not promising you a time, but the impression is stable and doesn't spoil while you wait. If I seem to have vanished, write to me again: a pickup booked for nothing is one you pay for.
How it works, from impression to grill →07
When and how to ship
You order and pay for the kit online (€25); shipping in Italy is €8. Once you have my ok on the photo, you put everything back in the same box the kit arrived in, with the impression still in its tray, jars and syringes included, and ship it to the address I give you in chat. No express courier needed.
The silicone impression holds fine for one or two weeks, so there's no rush: if my ok comes in the evening, ship calmly the next day. From when I receive it, the 3D scan and the rest of the work begin.
08
Good impression or one to redo?
In the kit's sheet you'll find a photo of a good impression next to one to redo: compare them with yours before sending me the shot. Here's what I look at when I get the photo:
- Good: sharp tooth edges
- You can see the profile of every tooth, with the small dips between one tooth and the next. The surface is defined, not shiny and flat.
- Good: no air bubbles
- No craters or round holes on the part that touched the teeth. Bubbles come from paste rushed in or wet teeth.
- Redo: doubled or blurred image
- Doubled or smeared outlines mean the shell moved between the two layers, or you moved your jaw. It gets redone.
- Redo: smooth empty patches
- If part of the arch is smooth with no tooth marks, the paste didn't grab there: the exact information I need is missing.
✓ Good
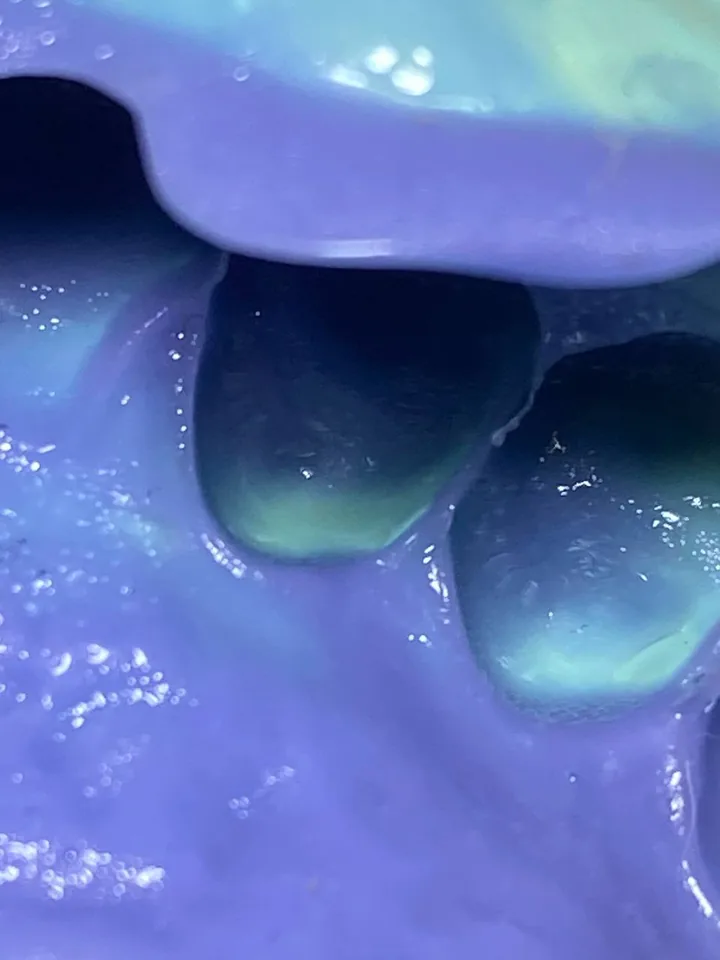
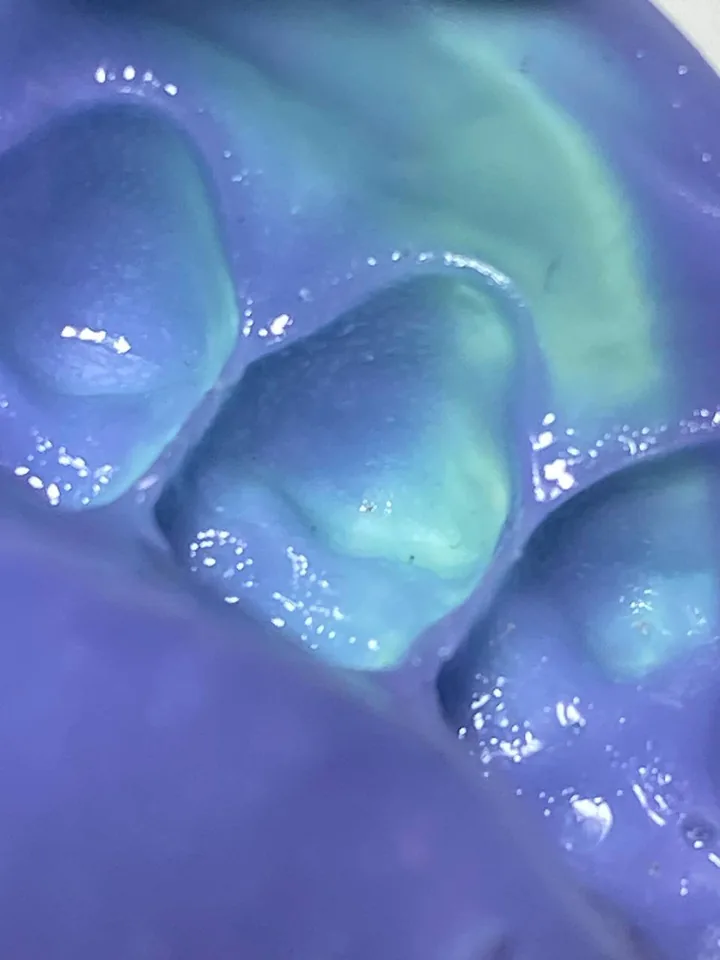
✕ To redo
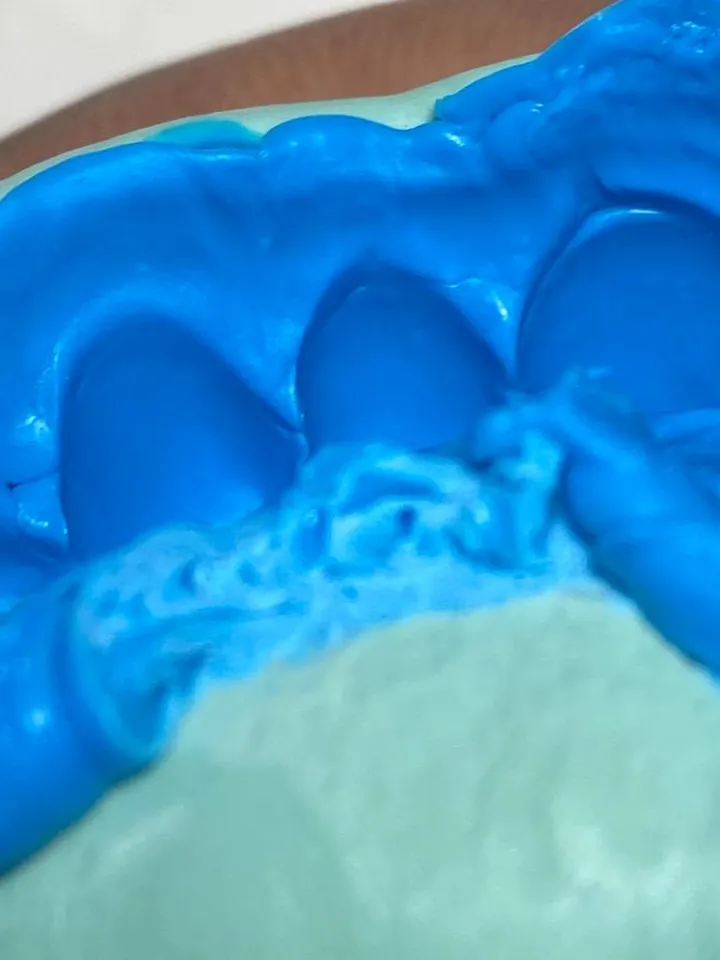
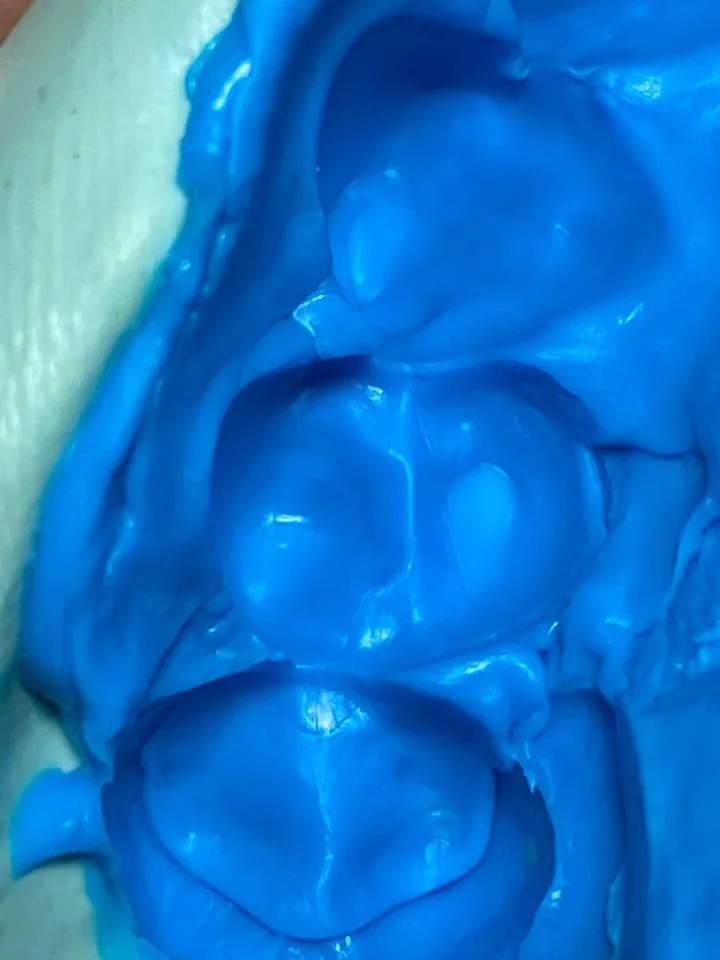
When in doubt, send it anyway: I'd rather look at it myself and tell you if it's fine than have you guessing alone. That's what the photo gate is for.
FAQ
Frequently asked questions about the home impression
Does a home impression come out as precise as one at the dentist's?+
With the right kit and the two steps done in order, yes: the precision wash captures the same level of detail needed to build a grill that fits. It isn't the place that makes the difference, it's the material and the method. And there's the photo gate: I check every impression before it leaves, so no unusable moulds ever arrive.
What if I get the impression wrong?+
It's not a problem: the kit has material for two complete attempts, with the reserve already set aside for the second. If I see from the photo that it's one to redo, I tell you right away and you make another. Nobody nails the good one on the first try, and that's not what I expect from you.
How long does the impression hold before shipping?+
The hardened silicone is stable: it holds for one or two weeks without deforming. So if I give you the ok in the evening you can ship calmly the next day, or after the weekend. In the meantime: quick rinse, dry it, zip bag not fully sealed, and into the kit's rigid box, away from heat.
What materials are the kit pastes?+
They're addition silicones (VPS, vinyl polysiloxane), the same type of material used to take impressions in dental practices. The putty makes the shell, the wash the detail. They only serve to take the shape of your teeth and then the mould comes back to me: nothing stays in your mouth.
Can I do it on my own or do I need help?+
You can do it on your own easily: it's designed for that. The one useful thing is a mirror in front of you and the instruction sheet within reach. If you'd rather have a hand, get someone to load the tray while you just focus on holding it steady in your mouth. And if you get stuck, message me in chat while you do it.
It starts with the impression.
Order the kit and it reaches you at home with the instructions. Online you only pay for the kit; the grill and the rest we sort out in chat, with no rush.
Order the impression kit ✦